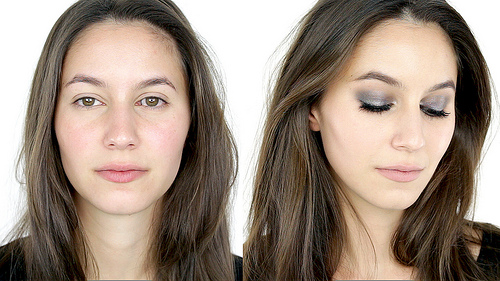
My take on a blackened smokey eye, very easy to wear. Lots of tips and alternatives that I’ve found make smokey eyes a bit more wearable.
Psst… You’ve seen a variation of this look before: here, here and here. ALSO, I’m doing a Q&A video as I receive similar questions on a day-to-day basis, so leave your questions (makeup related, personal, whatever) in the comments 🙂
Hello, everyone. Welcome back. Today, I am going to do a tutorial on a blackened, blackish smokey eye. It's not my favorite look on myself but every time I upload a picture on to Instagram or Facebook, people seem to love it. So I don't know, maybe I'm wrong. You tell me. I'll also try to include some tips and alternatives that make the smokey eyes a little bit easier to wear. Before I start, I've been wanting to do a Q&A style on video to knock of some really frequently asked questions. So leave all your queries in the comment section below this video or on any of my social media, whether it be make up related question or a question about me personally or relationship advice, I am great at that. Ask anything, I'm pretty candid. Now let's start.
So with any heavy eye look, I tend to leave the base in to a light house 00:00:56 so that the pigment doesn't drop down and compromise the freshness of our base. I do tend to do my brows first though. And I tend to do the brows before anything else because to me, they're part of the facial architecture. So it really helps to have your brows on when determining how far out to blend your eye shadow, how far upwards. Today, I'm going for a pretty natural brown. I want this smokey eye, and the whole make up really, to look like I didn't really try, like it was just entirely effortless even though it's not.
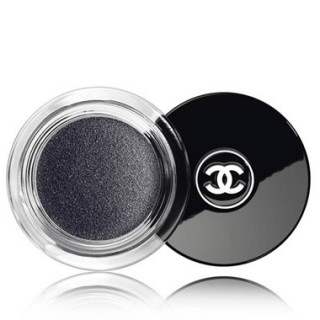
I'm next going to be taking Chanel Mirafique which is a black cream eye shadow with glitters in it. And I really like this one because it's very pliable and blendable. Some other popular black bases like the MAC Background I actually find to be quite finicky. I'm patting that all over the lid and slightly in to the crease. And make sure you don't forget the base of the lashes because we want it to be darkest there. And the key really with any smokey eye is to work in really thin layers because you can always go back for more and build the intensity. But if you get over enthusiastic with the black eye shadow, it can turn Taylor Momsen quite quickly. And that's a different look. No hay on Taylor Momsen. I really liked her in Gossip girl.
By the way, guys, I'm late to this party but I never actually watched the end of Gossip Girl. They kind of lost me half way along and no spoilers but I found out who gossip girl was. I really did not see that coming. Am I moron? Is anyone here old enough to know what I'm talking about? At this point, I got all of the lid. I'm going to look straight ahead and I'm going to determine how far up I need to take this black eye shadow. I wanted it to be slightly peeking out of the crease so I know I got to take out just a little bit further. And as you get to the crease, you can really lighten your touch. So by now, you got something that looks a little bit like this. You got some black base peeking out through the crease.
This has got a little bit of litter and for the most part, do not want. I don't have very defined sockets and it looks my eyes look puffy. So I'm going to take a matte transitional shade. And I'm just going to run that through the crease. So I'm just slowly circling that over the seam of the eye shadow and this will really help to blend out that harsh line. And because I forgot to use earlier, I'm just going to run that black base on the lower lash line. Okay, so we're going to layer some eye shadows to intensify the smokey eye. The palette that I'm using is sadly limited edition. Don't worry, it seems that I was the only person in the world who liked this palette. Everyone else sold this. If you have blackened purple, a blackened green, a blackened choco, now would be the time to use them. And this fun shade avocados, who actually uses those? I do. If you're working with really soft shadows trying to fall out or tricky eye shadows in general, these are your friend. Become acquainted.
I'm patting the black and purple in the inner half of the lid. This is messy, messy, messy. Don't stress. I'm going for colored nuances of black today because I think that stark black is a bit harder to pull off. But also I think that the variation is interesting. Then I'm going to take the blackened green shade and I'm patting that on the outer half of the lid. Patting will produce less fall out. If I swat, it's going all over my cheek and I'm keeping these below the crease because holy shimmer batman, I'm batman.
Next, I'm going to take each color and just pat them over the seam so that the colors appear to blend in to each other. And then with the other side of my sponge tip applicator, I have the blackened choco shade and I'm just dabbing that in to the outer corner and a touch in to the outer crease. Just want some extra dip there. And back to our blending shade, I'm going to slowly blend that through the crease so that the lead color doesn't stop abruptly. I tend to raise my eyebrows when I do this so that I can blend without interrupting the lid shade.
Then we're going to mirror that placement on the lower lash line. If you are seeking a really dramatic and sultry smokey eye, then you can blend this quite far down. Or if you prefer more of a softer haze, then you can keep it quite close to the lash line. Then I'm going to take the iridescent pink shade on my finger and I'm going to stamp that in the center of the eyelid. This lends an interesting hue, sort of mother of pearl. But in general, I find that center lid highlights are a really handy way of preventing a smokey eye from becoming too dark or too overwhelming. I'm also placing that in the center of the lower lash line.
Okay, now perhaps the most important tip for those struggling with smokey eyes, inner corner highlights. It seems so obvious but it's so important. This will help to break up the darkness but also if you have slightly closet eyes like myself, it will create the illusion that they're further part. And play with it. You can blend this in a corner highlight over the entire inner third if you find that flattering for your eye shape. I don't think smokey eyes by definition need to be dark all the way around. Before I go any further, I'm going to take some liquid eyeliner and make a very fine line along my top lash line. This is just to conceal the false lashes I'm going to apply today but if you're not wearing false lashes, then you can skip this step. Then I'm going to tight line, broken record. I always do this. But in particular, smokey eye seem unfinished without this step.
Okay, traditionally with a smokey eye, we'd now be lining our lower wood line with coal. And I'll be honest with you guys, I hate that look on myself. I love it on other people. I think it's so beautiful and so sultry but on me, it makes my eyes look really small and really buggy. So if you feel the same way, a good alternative is a dark but reflective eye liner. So this one is sort of like dark khaki and it has some pink reflect. So you'll still achieve that framing effect but the shimmer will catch the light a little bit and it won't be so buggy eyed.
Okay, I'm not going to apply some false lashes. Now, I know the false lashes aren't exactly effortless but we're going to digress a little bit here because there are really easy way to make your eyes look larger and to make your smokey eye less grungy and more pretty. So I'm going to be using some clusters. I'm still in love with this keys lashes. And I saw these actually the other day. Mario Dedivanovich, is it? He's Kim K's make up artist. He uploaded a picture on to Instagram of these lashes and I felt so validated. I was like, “Yes! They're amazing!”
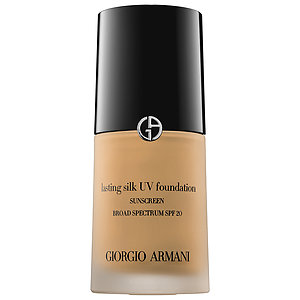
Okay, so I've gone ahead and applied about four short clusters on the outer corner and about two extra short clusters towards the center of the lid. I also went and did my mascara on both my top and bottom lashes and now I'm just going to take some Bioderma and clean up all of that fall out underneath my eye because you don't want that mixed in with your base. Okay, for my base today, I'm going to be a little bit repetitive and use what I use in my last video which was the Armani Lasting Silk mixed with the Le Blanc De Chanel in about a 50/50 ratio. And this is just my favorite combination at the moment. I'd be wearing it for about a month straight. I tend to prefer a more understated base with a smokey eye.
But you know what, do what you need to do so that you feel confident and your base feels fresh. If you have blemishes, then you can conceal that. If you have pigmentation, then you can correct that, and that goes for all of my videos. Alter it to fit your preferences and your needs. I'm going to pay extra attention to my under eye area today because smokey eyes do have the tendency to make you look a little bit tired so I'm just starting off with an illuminating sort of concealer just to deflect any shadows or hallows. And then I'm going to go in with a bit more of a pigmented concealer just in the areas where I have strong discoloration.
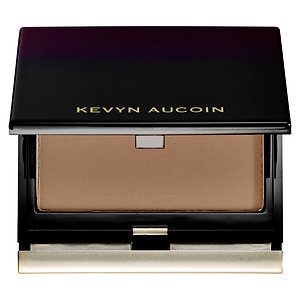
So for the cheeks, it's really whatever you want to do – blush, bronzer, contour, highlight. You know what suits you and you know what you like. But oday, I'm going to use my favorite contour palette. This is the Kevyn Aucoin's sculpting and I'm using the included brush. I heard recently that Kevyn Aucoin has redesigned the packaging for his product and it no longer comes with this brush which is such a pity because it's a great brush once you get the hang of it, very directional. I think I sense a bit of cost cutting there, Kevyn Aucoin. Boo.
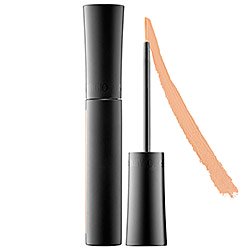
For the lips, I'm going for a pinky nerd. It's just something that will pale down my lips enough that the eyes take focus. And I find – this is one of the Hourglass Lip Stylo – I find that they're best patted in otherwise can look a little bit concealer lips. And there you have your blackened blackish smokey eye. A quick overview of the wearable smokey eye tips that I mentioned in this video. You have your inner corner highlight, your central lid highlight. Try nuances of black eye shadow. Play around with dark but iridescent eye liners for the low water line and keep the rest of the face quite clean and cohesive. If you've done all that and your eyes still feel a little bit small or the look is a bit grungy for your liking, add some false lashes because that really amps it up and makes it a lot prettier. I hope you guys enjoyed the tutorial and don't forget to leave your questions for the questions and answers video either in the comments below this video or on any of my social media. I hope you guys all have a wonderful day. Drive safely. Don't walk in to dark alleys and floss your teeth. B-bye.
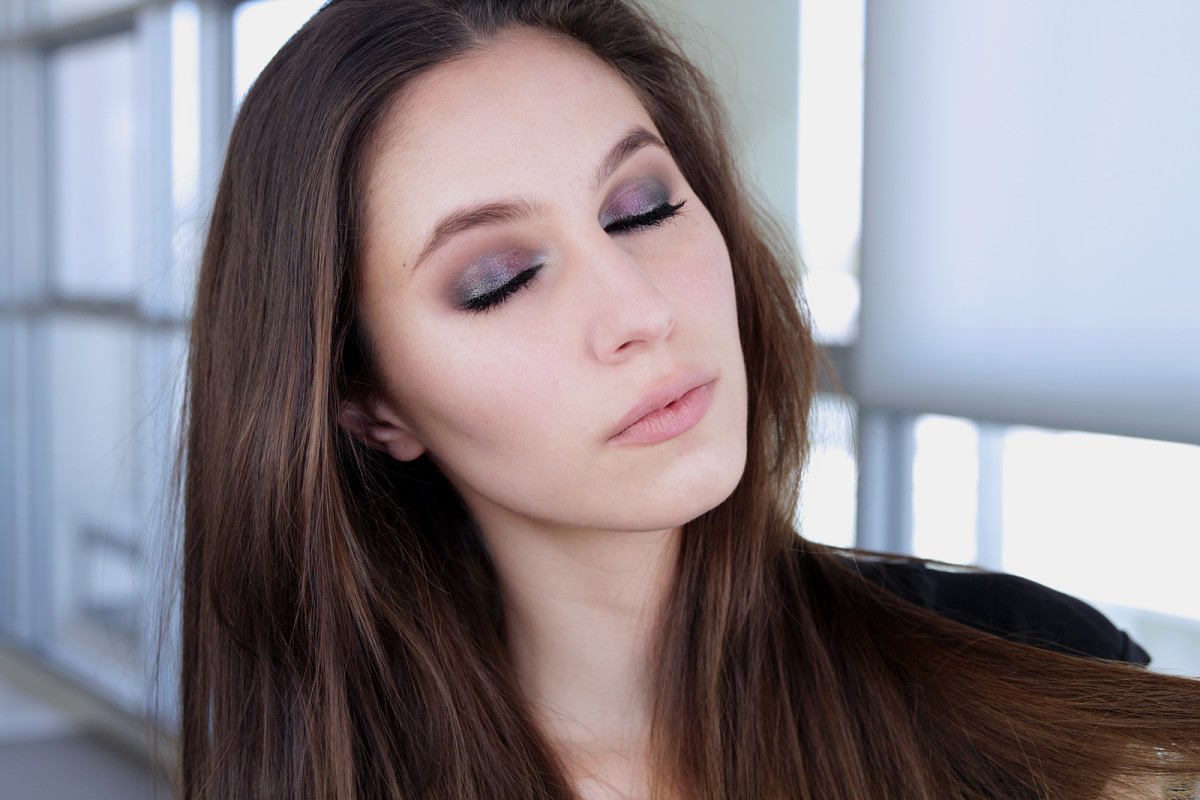
Final Look

Nail Polish I’m wearing in this tutorial
Chanel June (a pastel orange/apricot that reminds me of sherbet)
Complete List of Products
Anastasia Beverly Hills – Brow Wiz in Medium Ash
Chanel Illusion D’Ombre – Mirifique
Chanel – Ombre Perlees de Chanel Eyeshadow Palette
Rouge Bunny Rouge – Chestnut Napped Apalis Eyeshadow
Rouge Bunny Rouge – Raven Glaze Lacquer Eyeliner in Black
Rouge Bunny Rouge – Long Lasting Eye Pencil in Salome/Black
THREE – Performance Eye Pencil in Eye Doll 07
Kiss Lashes – Trio Short Combo
Benefit – They’re Real Mascara
Giorgio Armani – Lasting Silk Foundation in 4.5
Chanel – Le Blanc de Chanel Sheer Illuminating Base
Giorgio Armani – High Precision Retouch Concealer #3
Dermablend – Fluid Corrective Foundation in Opal
Kevyn Aucoin – Sculpting Powder in Medium
Hourglass – Lip Stylo No.1
xxkarima
This looks so flattering on you! I always struggle with smokey eyes, maybe I’ll try some of your tips next time. Thank you!
Try this kind of smokey eye! The iridescent shades and iridescent eyeliner make it much more wearable, in my opinion. This is coming from someone who doesn’t really like blackened smokey eyes on herself! x
gorgeous as usual, karima! question: are you still in uni? anddd any hair tips/fav products? your hair is so pretty!
Thank you, Attika 🙂 I’ll answer those questions in the Q&A video, thanks for giving me some awesome material to work with 🙂 x
Absolutely love that look!!!! Beautiful & really does look effortless!
alex @ https://pinkelephantbloggin.com/
Thanks, Alex! x
This smokey eye is absolutely gorgeous! It looks amazing on you 🙂 I have a similar eye color and skin color/undertone as you, so I love following your blog — such great inspiration!
xo,
Kristin
https://plumpearls.com
Thanks Kristin! x
Awesome look, very flattering on you (unfortunately I find that dark eyeshadow doesn’t agree with me at all – maybe someday…)!
I want to ask you about the make-up you wear every day – do you have a “go to” look, or do you figure it all out from scratch on the spot? Also, is the make-up you present on your blog the kind of thing you would normally wear when out an about, or do you usually opt for a more “saute” version?
I’d absolutely love it if you could do a minimalistic/polished-but-still-natural tutorial, as in, the “your face but better” kind of look, with more lightweight and less full-on products. So far I’ve enjoyed every recommendation of yours I’ve managed to purchase, so it would be nice to hear your recommendations/favorites in terms of “no make-up”-type make-up 🙂
Hey Alex! I find that dark eyeshadows are tricky but if they have some complex iridescence, they look far less dark/overwhelming on the eyes so do try that 🙂 Thanks for your questions, I will definitely answer them in the Q&A video. Also, I’m working on more no-makeup-makeup type posts and possibly a video, so keep your eyes peeled for that 🙂 xx
Karima I absolutely love your blog. Please would you show us your lipstick routine as mentioned in your By Terry lipstick review. Also what are your career ambitions? What are you doing at the moment?
Hey Tanama 🙂 I will show the lipstick routine in the Q&A video, that’s a really great idea! Thank you 😀 x
Yes, Kevyn Aucoin (the company, as the artist is no longer with us) changed the packaging and now there’s less than half the product 0.11 oz vs 0.23 oz! Plus it’s missing the brush that was reminiscent of Rae Moriss’s contour brush. So thank you for your reviews of this great product in the past because I wouldn’t have bought it otherwise.
Great smoky eye tutorial BTW.
Hey Lisa 🙂
I heard a lot of people disliked the included brush because it’s kinda scratchy; I agree it’s not the softest brush but it is so directional that I actually find it ideal for creating really defined cheekbones. Pity they’ve redesigned, huh? 🙁
xx
Absolutely gorgeous look! Looks kind of futuristic with the background behind you, big like from me 😀 I wish I could try it on me, but I’m very fair-skinned with pandaesque under-eye circles, me-so-sad :'(
As for the question, I believe one of your parents is from Eastern Europe, so I wanted to ask you what does your heritage represent to you? Does it affect you? Or has no impact on your life… Yeaah I know it’s so makeup related! lol So please don’t answer if you feel it’s too private. I’m from Estonia, hence the question 😀 Looking forward to your next tutorial! xx
Hey Maarja 🙂 That futuristic design behind me is actually my living room! LOL. My house is that ultra modern/sterile decor. I really believe that all people can pull off a similar smokey eye, it’s all about altering it to suit you (if you have dark circles, you might want to minimise lower lashline shading and pay extra attention to concealing undereye circles, like I did in the video).
Thanks for your question 🙂 xx
amazing! it looks pretty and absolutely suits you 😉
BTW you have the whitest smile I’ve ever seen. would you mind sharing with us your secret?:D
thank you
Hey Noha!
I’ll talk about my teeth in the Q&A video, I get a few questions about that. xx
Well, not going to lie! I am one of those people that sold off that Chanel palette, I was warned I wouldn’t like it… Looks beautiful Karima 🙂
WUT? Did you try it before you sold it? Cheeky Karima, I just purchased a backup 😉 x
Love the items you used. You look smoking hot!
Thank you, too kind 🙂 x
You always do the best smokey eyes! Beautiful!
Thanks Chris! xx
Beautiful as always Karima! Almost thinking of buying the Chanel mirifique now even though smokey eyes doesn’t suit me..:)
I wrote a few questions for your Q and A on your facebookpage but just have a quick one, if you already have the Guerlain meteroites (like I do! yay), do you need the hourglass ambient lighting powder? Just wondering because I remember you have both!
Also I remember that you own the by terry rose de rose sheer liquid blush, I’ve always dreamt of owning that since I saw Eldridge use it in one of her old tutorials….do you recommend it? Might just go for a trip to David Jones today….
Cheers <3
Chanel Mirifique is my favourite of the IdO’s! Even if you don’t use it as an eyeshadow, I find it to be fantastic for a soft black, iridescent liner (with the included brush! Don’t toss that!).
I’ll answer the Meteorites VS Ambient Lighting powder question in the video because I know a lot of people are curious. As for the By Terry Rose de Rose blush, they are veryyy shimmery and have a soft colour. If that sounds like something you’d like, go for it 🙂
PS: went to Makeup Store today, did some damage and got Masai Eyeshadow, looks like an amazing contouring shade 😉 Thanks for the rec. xx
Karima – I LOVE this video. It is very instructional and well done. Your narrative and tips on “how to” achieve this looks are so clear and specific. For someone like me who doesn’t have a lot of confidence in my application abilities, this is mega-appreciated. I can’t wait to try this out. I’ll let you know how it goes :o) Best, SJ
Hey SJ 🙂
So glad! It’s really good to hear that I’m being coherent (because sometimes I wonder!). Let me know 🙂 I’m always here for troubleshooting 😉
xx
Lovely as always! I gave up trying a smoky eye years ago (undereye circles galore!) but your take with the reflective, complex blackened shades is rather brilliant! I’ll definitely be giving it a go again. My question, what surgery did you have done on your eye? I have an intense phobia of anyone or thing touching my eyes so this question purely stems from morbid curiosity :/
Hey Lauren 🙂
Reflective smokey eyes are sooo much easier to wear. Really, the iridescence detracts from the overwhelmingly dark look so if you have some high shimmer shadows (dark shades), try that.
I’ll actually address the eye surgery in the video because I’ve got an overwhelming number of questions (and people letting me know that I have a spot in my eye- just in case I didn’t notice LOL).
xx
Gorgeous look! Your tutorials are very easy to understand, Karima. Love the way you explain things too. I have a problem with those who just babble on, talking at 100 words a second >_<
Hey Lily! I try to be informative (at times, not very concise! lol) and I’m so glad you find them easy to understand 🙂 xx
Hi Karima,
Do you know where I can sell brand new and gently used makeup online?
There is nothing worse than when you buy the wrong Colour in a face product and then you get stuck with it when you have only used it once or you buy an eyeshadow shade which you think will look great on you but it washes you out.
Thanks
Kristy
Hey Kristy!
That’s a tricky one, since you can no longer sell used cosmetics on ebay. I do blogsales- do you have an ebay account or something that can verify that you are a trusted seller? If you do, you can run a blogsale yourself but if not, I think some may hesitate to purchase. Sorry I can’t help more! xx
Hello Karima! I am loving your blog and tutorials, thanks for sharing what you know and making it so fun!
Now, some questions for your Q&A… I have puffy eyes (upper and lower lid) and in the morning they can be REALLY puffy. In your last vid you say you have this too. Any tip for concealing bad puffiness in those days when it is important you look awake and bright-eyed?
This one is a bit difficult to answer, I think: any advice for us green people? yes, as in Martians. Ok, not Martians but olive-undertoned people. I have green undertones and am pale, so don’t have that Mediterranean allure. Instead my skin tone can border on sickly looking. I can’t use too much yellow because it pulls out the green. I counteract the green with rosy tones but it can’t be too rosy or it clashes. Anyhow, if you have any advice in your infinite wisdom…. 😉
Great questions 🙂 I’ll answer the puffy eye question in the video but in terms of green colouring: I am also a bit green! In addition, I have quite a bit of surface redness (fun times!). Have you tried coral and peach blushers? How about pale pinks? The coral and peach works for me because it adds colour without making me look ruddy but my aunty is SUPER green and pale pinks seem to work on her. There is a bit of trial and error, here. A bit of neutral bronzer thrown in the mix might help here, too.
Also bla bla I generally hate this advice but: what shade do you flush naturally?
xxkarima
This look is over the top !!
Have to try it this week-end. 🙂